Is your Epson XP 440 not printing? This guide will provide six quick solutions to help you get your printer working again.
Table of Contents
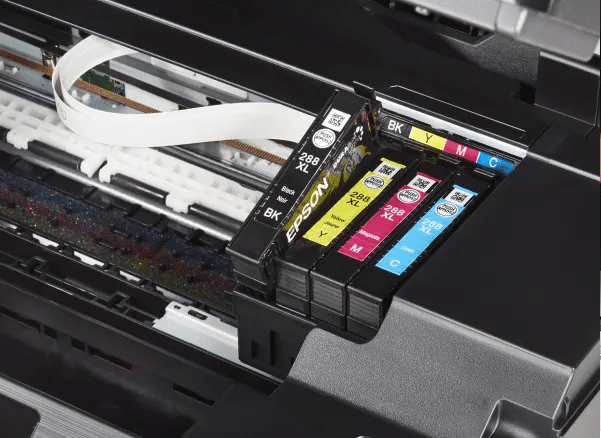
Method 1: Check Ink Levels and Replace Cartridges

Steps:
- Power On the Epson XP 440:
- Turn on your printer.
- Navigate to Setup:
- Use the arrow buttons to navigate to “Setup” and press OK.
- Check Ink Levels:
- Select “Ink Levels” and press OK.
- Check for low ink levels and identify any cartridges that require replacement.
- Replace Cartridges:
- If any cartridges need replacement, select “Cartridge Replacement” and press OK.
- Open the top cover of the Epson XP 440 printer when prompted.
- Press the start button, and the ink cartridges will slide into position.
- Install New Cartridges:
- Unpack the new ink cartridge and remove the sticker.
- Remove the old cartridge and install the new one.
- Repeat the process for any other cartridges that need replacement.
- Complete the Process:
- Close the top cover.
- Load some sheets of paper and press the print button.
- When the display shows “Charging Ink,” select “Confirm” and press OK.
Method 2: Change Printing Preferences
Steps:
- Open Control Panel:
- Click on the Windows search bar and type “Control Panel.”
- Open the Control Panel.
- Access Devices and Printers:
- Click on “View devices and printers” under “Hardware and Sound.”
- Modify Printing Preferences:
- Right-click on your Epson printer and select “Printing Preferences.”
- Go to the “Maintenance” tab and select “Extended Settings.”
- Ensure that “Skip Blank Page” is selected.
- Press OK and close the window.
Method 3: Run a Nozzle Check
Steps:
- Access Maintenance:
- Make sure your Epson XP 440 printer is turned on and you are on the home screen.
- Navigate to “Setup” using the arrow buttons and press OK.
- Select “Maintenance” and press OK.
- Perform Nozzle Check:
- Choose “Nozzle Check” and press OK.
- Ensure the printer is loaded with paper and press the print button.
- The Epson XP 440 printer will print a nozzle check pattern. Look for any missing lines.
- Clean Print Head if Needed:
- If there are missing lines, select “Head Cleaning” and press OK.
- Press the start button to begin the cleaning process.
- Once the cleaning is done, run another nozzle check.
Method 4: Clean Printhead Manually
Steps:
- Access Cartridge Replacement:
- Power on the printer and navigate to “Setup” using the arrow buttons, then press OK.
- Select “Maintenance” and press OK.
- Choose “Cartridge Replacement” and press the start button.
- Prepare for Cleaning:
- Open the top cover, and the printhead will move to the middle.
- Remove the ink cartridges.
- Fold a paper towel and place it under the printhead.
- Manual Cleaning:
- Power off the printer, holding the printhead in place until the printer is completely turned off.
- Move the printhead to the side and place the folded paper towel underneath.
- Use a printhead cleaning kit with a syringe.
- Insert the silicone tubing over the nozzle with the issue and gently push the cleaning solution through until it unclogs.
- Reassemble and Test:
- Remove the syringe and paper towel.
- Clean up any mess.
- Replace the ink cartridges in their original positions.
- Close the top cover and power on the printer.
- Print a nozzle check pattern to see if the issue has improved.
Method 5: Update Printer Drivers
Steps:
- Open Device Manager:
- Press the Windows and X keys together and select “Device Manager.”
- Update Driver:
- In the Device Manager window, expand the “Print queues” section.
- Right-click on your Epson XP 440 printer and select “Update driver.”
- Search for Updates:
- Click “Search automatically for updated driver software.”
- Allow Windows to search for and install any updates.
- Restart and Test:
- Once updated, restart your computer and printer.
- Print a test page to check if the black ink issue is resolved.
Method 6: Set Printer as Default
Steps:
- Open Control Panel:
- Type “Control Panel” in the Windows search box and open it.
- View Devices and Printers:
- Click on “View devices and printers.”
- Set Default Printer:
- On the “Devices and Printers” screen, right-click on your Epson printer.
- Select “Set as default printer.”
- Restart and Test:
- Restart your printer and computer.
- Print a test page to ensure the black ink is printing properly.
With these methods, you should be able to resolve issues with your Epson XP 440 not printing. If the problem persists, it may be necessary to contact Epson support for further assistance.
Summary Table of Solutions
| Method | Steps Summary |
|---|---|
| 1. Check Ink Levels and Replace Cartridges | Power on Epson XP 440 printer, navigate to setup, check ink levels, replace cartridges, load paper, and confirm ink charging. |
| 2. Change Printing Preferences | Open Control Panel, access devices and printers, modify printing preferences, ensure “Skip Blank Page” is selected, and save changes. |
| 3. Run a Nozzle Check | Access maintenance, perform nozzle check, check pattern, clean print head if needed, and repeat nozzle check. |
| 4. Clean Printhead Manually | Access cartridge replacement, prepare for cleaning, manually clean printhead using cleaning kit, reassemble, and test with nozzle check. |
| 5. Update Epson XP 440 Printer Drivers | Open Device Manager, update driver, search for updates, install updates, restart computer and printer, and test printing. |
| 6. Set Printer as Default | Open Control Panel, view devices and printers, set printer as default, restart printer and computer, and test printing. |

