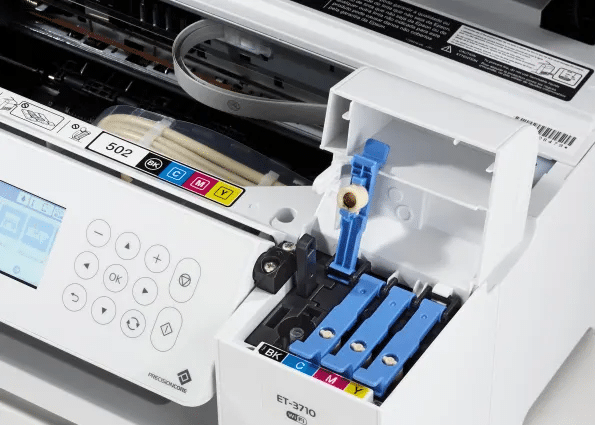
The Epson ET 2760 is a popular all-in-one printer known for its high-quality printing and efficient ink usage. However, like all printers, it can sometimes encounter issues, such as epson et 2760 not printing color. If you’re facing this problem, don’t worry!
Table of Contents
Fix: Epson Ecotank 2760 Not Printing Color
This article will guide you through three quick solutions to fix your epson et 2760 not printing color and get it printing in color again. The methods include performing a nozzle check, conducting a printhead cleaning cycle, and running a power cleaning. Let’s dive into the details.
Method 1: Nozzle Check
The first step in diagnosing and fixing epson 2760 not printing color issues is to perform a nozzle check. This process helps identify if any of the nozzles are clogged and need cleaning.
Step-by-Step Guide to Nozzle Check
- Navigate to Maintenance:
- Use the arrow buttons on your printer’s control panel to navigate to the “Maintenance” menu.
- Select Nozzle Check:
- Once you are in the maintenance menu, select “Nozzle Check” and press the OK button.
- Prepare to Print:
- The printer will prompt you to load letter or A4 size plain paper in the rear paper feed. Insert the paper and press the Print button to start the nozzle check.
- Print Nozzle Check Pattern:
- The printer will print a nozzle check pattern. Inspect the printed pattern to see if there are any missing lines or gaps.
- Repeat if Necessary:
- If the nozzle check pattern shows missing lines, print a second nozzle check to determine if the printhead requires cleaning.
If the nozzle check indicates that there are still issues, proceed to the next method: printhead cleaning cycle.
Method 2: Printhead Cleaning Cycle

If the nozzle check shows missing lines or gaps, the printhead may need cleaning. This process can help remove any clogs and restore proper ink flow.
Step-by-Step Guide to Printhead Cleaning Cycle
- Remove the Power Cable:
- Turn off the printer and unplug the power cable. This step is crucial for your safety.
- Prepare the Printer:
- Place a folded paper towel along the track inside the printer. This will catch any ink or cleaning solution that may drip during the process.
- Slide the Printhead:
- Gently slide the printhead over the paper towel.
- Remove the Top Cover:
- Using a screwdriver, carefully remove the top cover of the printhead assembly.
- Lift the Ink Cartridges:
- Slowly lift the ink cartridges and set them aside. Be careful not to unhook or damage any of the ink lines.
- Prepare the Cleaning Solution:
- Fill a syringe with a cleaning solution specifically designed for printheads. Attach the syringe tip to the nozzle of the printhead.
- Clean the Nozzles:
- Gently push the cleaning solution through the nozzle. Adjust the paper towel at the base to catch any excess solution.
- Repeat for Other Nozzles:
- Repeat the cleaning process for each nozzle. Ensure that the cleaning solution is completely removed after cleaning.
- Reinstall the Ink Cartridges:
- Carefully reinstall the ink cartridges back into their original positions.
- Reassemble the Printer:
- Replace the top cover of the printhead assembly and plug the printer back in.
If the printhead cleaning cycle does not resolve the issue, proceed to the next method: running a power cleaning.
Method 3: Run Power Cleaning
Power cleaning is a more intensive cleaning process that can help resolve persistent printhead clogs. This method should be used if the previous steps have not resolved the color printing issue.
Step-by-Step Guide to Run Power Cleaning
- Turn Off the Printer:
- Ensure the printer is turned off.
- Access Power Cleaning Mode:
- Press and hold the Power and Help buttons simultaneously until the power cleaning screen appears.
- Confirm Ink Levels:
- The printer will display a message to confirm that all ink tanks are at least a third full. Press OK to proceed.
- Begin Power Cleaning:
- The power cleaning process will begin. Do not turn off the printer during this process.
- Complete Power Cleaning:
- Once the power cleaning is complete, the printer will display a message. Press OK to confirm.
- Print Nozzle Check Pattern:
- To determine whether the issue is resolved, print another nozzle check pattern. This will help you see if the color printing problem has been fixed.
Video: Epson Ecotank 2760 Not Printing Color
Conclusion: Epson Ecotank 2760 Not Printing Color
Fixing epson et 2760 not printing color can be a straightforward process if you follow these three quick solutions. Performing a nozzle check helps identify if there are any clogs in the nozzles. If clogs are found, a printhead cleaning cycle can help remove them. For more persistent issues, running a power cleaning can provide a deeper clean and restore proper ink flow.

