Is your HP Envy 6055 printing blank pages? Don’t worry, this guide offers five quick solutions to get your printer back on track.
Table of Contents
Fix HP Envy 6055 Printing Blank Pages
Check Ink Levels Before Replacing
Before replacing cartridges, let’s confirm they’re low. Here’s how:
- Load Paper: Ensure your paper tray is filled with plain white paper.
- Access HP Envy 6055 Printer Menu: Press the minus button next to the setup icon (lower left corner of the control panel).
- Navigate to Tools: Tap the right arrow button to select “Tools” and then tap “OK”.
- Check Ink Levels: Tap the right arrow again and select “Estimated Ink Levels”. Finally, tap “OK”.
- Replace or Proceed: If the ink levels are low, skip to step 8 for replacement instructions. If ink levels are good, continue to the next method.
Understanding the Culprit:
Blank pages can occur due to several reasons: empty or low ink cartridges, clogged printheads, or even incompatible cartridges (if using non-HP brands). We’ll explore solutions for each scenario.
Solution 1: Replenishing the Ink Supply
Step 1: Prepare the HP Envy 6055 Printer:
- Load plain white paper into the input tray to avoid paper-related issues.
- Turn on the printer using the power button.
Step 2: Accessing the Cartridges:
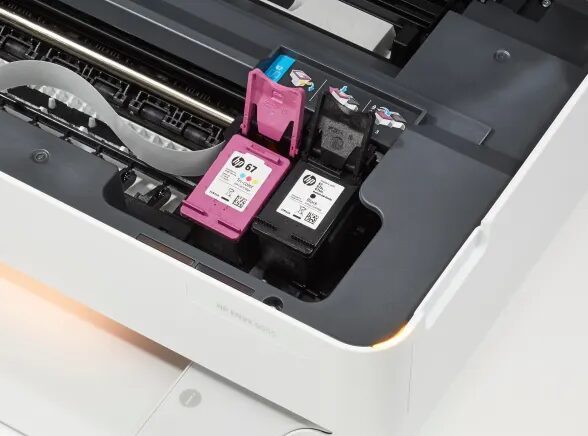
- Open the cartridge door and wait for the HP Envy 6055 printer to become idle and silent. This ensures the cartridges are properly positioned for removal.
Step 3: Removing Old Cartridges:

- Gently press down on the used cartridge to release it.
- Pull the cartridge out of its slot.
- Caution: Avoid touching the copper-colored contact and ink nozzle to prevent accidental smudging or damage.
Step 4: Replacing with New Cartridges:
- Remove the new cartridge from its packaging.
- Pull the tab to remove the protective plastic tape.
- Hold the cartridge with the nozzle facing the printer and carefully insert it into the designated slot.
- Push the cartridge forward until it clicks into place, ensuring a secure fit.
Step 5: Verifying Compatibility:
- Match the icon on the cartridge with the icon on the slot to confirm proper placement (black cartridge goes in the black slot, tri-color goes in the tri-color slot).
Step 6: Closing the Door:
- Close the cartridge door securely.
Solution 2: Cleaning the Printhead
If replacing cartridges doesn’t solve the issue, a clogged printhead might be the culprit. Here’s how to clean it:
Step 1: Load Paper:
- Ensure the input tray has some paper loaded for the cleaning process.
Step 2: Accessing the Cleaning Menu:
- Navigate to the lower left corner of the control panel on your printer.
Step 3: Selecting “Tools”:
- Press the minus button next to the setup icon.
- Use the right arrow button to highlight “Tools.”
- Press the OK button to confirm.
Step 4: Initiating Cleaning:
- Use the right arrow button again to select “Clean Printhead.”
- Press OK, and the printer will begin the automatic cleaning cycle.
Step 5: Evaluating Results:
- Once the cleaning is complete, the printer will print a test page.
- Review the print quality on this page.
Step 6: Re-cleaning (Optional):
- If the print quality remains poor, repeat the cleaning process by selecting “Level 2 Clean.” You might need to clean the printhead several times for optimal results.
Solution 3: Addressing Incompatible Cartridges
In rare cases, using incompatible ink cartridges (other than genuine HP) can cause printing problems. If the above solutions fail, consider these steps:
- Identify Cartridge Type: Check the cartridge model numbers and ensure they match the ones recommended for your HP DeskJet F4400 printer.
- Replace with HP Cartridges: If you’re using non-HP cartridges, try replacing them with genuine HP ink to ensure compatibility.
Identifying the Faulty Cartridge:
- Print a Test Page: Use the printer’s control panel menu to print a test page.
- Examine the Print Quality: Look for any defects on the printed page, particularly in colored blocks and black text.
- Black Text Issues: If black text shows streaks, smudges, or is missing entirely, the black ink cartridge needs replacing.
- Colored Block Issues: If colored blocks appear faded, streaky, or missing, the tri-color ink cartridge needs replacing.
Replacing the Cartridge:
- Load Paper: Ensure your input tray has plain white paper.
- Turn on Printer: Press the power button.
- Open Cartridge Door: Wait until the printer is idle and silent before opening the cartridge door.
- Remove Old Cartridge: Gently press down on the used cartridge to release it, then pull it out of its slot. Avoid touching the copper contacts or ink nozzle.
- Prepare New Cartridge: Remove the new cartridge from its packaging and pull the tab to remove the protective tape.
- Insert New Cartridge: Hold the cartridge by the sides with the nozzle facing the printer, and insert it into the slot.
- Secure the Cartridge: Push the cartridge forward until it snaps into place.
- Match Icons: Verify that the cartridge icon matches the slot icon.
- Close the Door: Close the cartridge door securely.
Solution 2: Running HP Print and Scan Doctor
- Download HP Software (if needed): If you haven’t already, visit the HP website and download the HP Print and Scan Doctor for your specific printer model.
- Install the Software: Open the downloaded file and follow the on-screen instructions for installation.
- Run the Doctor: Open HP Print and Scan Doctor and click “Start.”
- Follow Instructions: Follow the on-screen instructions provided by the tool to diagnose and resolve the printer issue.
Solution 3: Configuring Printer Spooler Service
- Access Services: Press the Windows logo key, type “services,” and press Enter.
- Open Services App: Click on the “Services” app that appears.
- Find Printer Spooler: Locate and double-click on “Printer Spooler.”
- Stop the Service: Under the “General” tab, click on “Stop” and then “OK” to confirm.
- Open File Explorer: Press the Windows key and “D” simultaneously to open the File Explorer.
- Navigate to Spool Folder: Go to the following directory: “C:\Windows\System32\spool\printers”
- Delete Temporary Files: Delete all the files within this folder.
- Restart Services: Press the Windows key and type “Services” again, then press Enter.
- Restart Printer Spooler: Double-click on “Printer Spooler.”
- Set Startup Type: Under the “General” tab, set the “Startup type” to “Automatic.”
- Start the Service: Click on “Start” under “Service status” and then “OK” to confirm.
- Test Print: Try printing a test page to see if the issue is resolved.
HP Envy 6055 Printing Blank Pages FAQ
Why is my HP Envy 6055 printing blank pages when it has ink?
There are several reasons why your HP Envy 6055 might be printing blank pages even though the ink cartridges appear full. Here are the most common culprits:
- Clogged Printhead: Dried ink or debris can obstruct the tiny nozzles in the printhead, preventing ink flow.
- Incorrect Print Settings: Misconfigured printing settings can lead to various printing issues, including blank pages.
- Alignment Issues: A misaligned printhead might not deposit ink correctly on the paper, resulting in blank areas.
- Low Ink (Even if Indicated as Full): Ink gauge readings can sometimes be inaccurate. Even if the cartridge shows full, it might be low on ink.
- Faulty Ink Cartridge: A damaged or incompatible ink cartridge can cause printing problems.
- Software Glitches: Temporary software glitches on your printer or computer can disrupt the printing process.
- Hardware Issues: In rare cases, a hardware malfunction within the printer might be causing the blank page issue.
Why is my printer connected but printing blank pages?
Even if your printer appears connected to your computer or Wi-Fi network, there can still be reasons for blank pages:
- Stuck Print Job: A stuck print job on your computer might be preventing new jobs from printing. Try canceling any pending print jobs.
- Outdated Printer Driver: Outdated printer drivers can cause compatibility issues. Update your printer driver to the latest version.
How to do a hard reset on HP Envy 6055 printer?
A hard reset can sometimes clear temporary glitches that might be causing printing problems. Here’s how to perform a hard reset on your HP Envy 6055 printer:
- Turn on the printer.
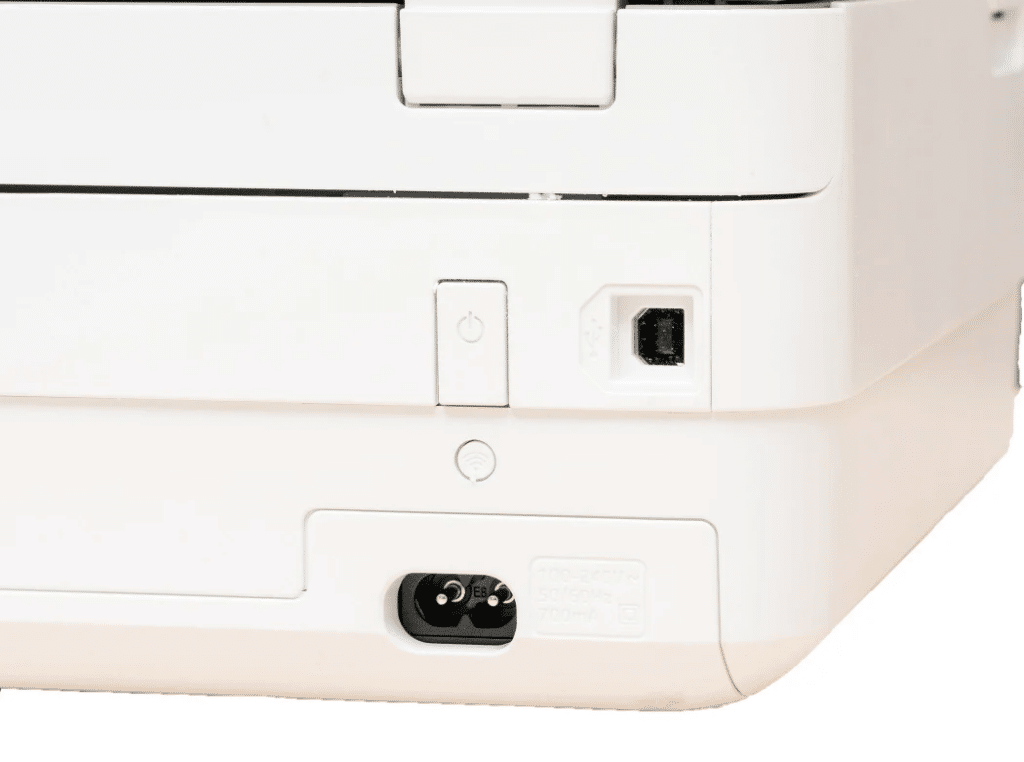
- With the printer powered on, unplug the power cord from the back of the printer.
- Wait at least 60 seconds.
- Plug the power cord back into the printer.
- Turn on the printer.
Why is my HP Envy printer not printing even though it has ink?

The reasons mentioned above for blank pages can also apply to a printer that isn’t printing at all. Additionally, consider these factors:
- Faulty Connection: Ensure your printer is properly connected to your computer or Wi-Fi network. Double-check cables and network settings.
- Print Job Stuck (as mentioned above): Cancel any pending print jobs on your computer.
If none of the solutions mentioned above solve the issue, regardless of your specific HP Envy model, it’s advisable to consult the HP user manual or contact HP customer support for further assistance. They can provide additional troubleshooting steps or diagnose any underlying hardware problems that might require repairs.

