Having trouble with your Epson WorkForce 7310 printer producing blurry or faded prints? Clogged print heads are a common culprit behind these printing issues. Before resorting to replacements, you can try manually cleaning the print head to restore vibrant and crisp printing.
Table of Contents
How to Clean, Replace, or Repair Your Epson WF-7310 Print Head (Unclog Black, Cyan, Magenta, Yellow Ink)
This guide will walk you through the process of cleaning the print head on your Epson WorkForce 7310 printer. We’ll also provide a video tutorial for a more visual demonstration.
Important Note: Manually cleaning the print head is a delicate procedure. If you’re uncomfortable following these steps, it’s advisable to consult a professional or refer to the official Epson user manual for your specific model.
Symptoms of a Clogged Print Head:
- Streaks or lines appearing on printed documents
- Faded or muted colors
- Missing sections of text or images
- Blank pages even with full ink cartridges
Tools and Materials:
- Soft, lint-free cloths (like microfiber cloths)
- Distilled water
- Cotton swabs (optional)
- Printer ink cartridges (replacements if necessary)
Safety Precautions:
- Always turn off and unplug the printer before any cleaning procedures.
- Avoid touching the electrical components or print head nozzles directly.
- Use only distilled water to prevent ink corrosion.
- Be gentle during cleaning to avoid damaging the delicate print head.
Manual Print Head Cleaning Instructions:
1. Prepare the Printer
- Power on the printer and initiate a print command to unlock the print head.
- Once printing starts, immediately unplug the power cable.
- Close the paper output tray.
2. Access the Print Head
- Open the printer’s top cover.
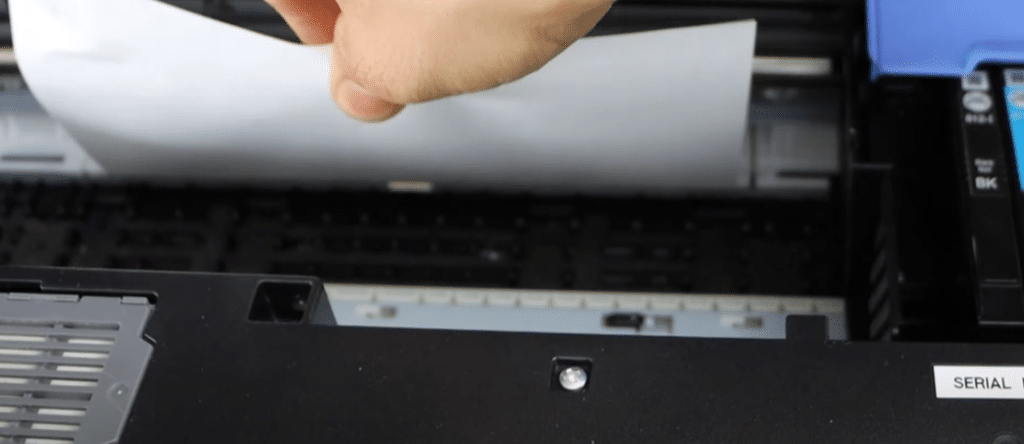
- Remove any paper stuck inside the printer to prevent jams later.
- Take out the ink cartridges by identifying the correct release latch for each.

3. Locate and Remove the Print Head Cover
- You’ll find a screw holding the print head cover in place. Remove the screw.
- Identify the release mechanism for the print head cover (refer to your user manual if needed). It might involve pushing a tab or sliding a lever.
- Carefully lift the print head cover to expose the print head.

4. Cleaning the Print Head

- Do not directly touch the print head nozzles!
- Use a soft, lint-free cloth dampened with distilled water.
- Gently wipe the bottom plate of the print head where ink residues might be visible.
- You can also use a cotton swab (dampened with distilled water) to clean hard-to-reach areas, but be extremely careful not to apply pressure.
- Repeat wiping with a clean, dry cloth to remove any remaining moisture.

5. Reassemble the Printer
- Carefully place the print head back into its designated position.
- Secure the print head cover with the screw.
- Reinstall the ink cartridges and ensure proper placement.
- Close the printer’s top cover.
6. Print Head Cleaning Cycle
- Plug the printer back in and power it on.
- The printer might display a message about the print head requiring maintenance. You can dismiss this message for now.
- Navigate to the “Maintenance” section on the printer’s control panel.
- Select “Print Head Cleaning” and initiate the cleaning cycle.
- This process typically takes a few minutes.
7. Print Nozzle Check
- Once the cleaning cycle is complete, perform a “Print Nozzle Check” to assess the cleaning effectiveness.
- The printed test page will display a grid of ink colors. Look for any missing or incomplete segments.
8. Repeat Cleaning if Necessary
- If the nozzle check reveals missing segments, you can repeat the print head cleaning cycle (up to two additional times) to see if it further improves the print quality.
9. Print Test Page
- If the nozzle check shows satisfactory results, print a test page to confirm your printer is functioning correctly.
- You can print any document or image to verify normal printing functionality.
FAQs on Epson WorkForce 7310 Print Head Cleaning:
Q: How often should I clean the print head?
- A: Routine cleaning isn’t necessary unless you experience printing issues. However, if you use your printer infrequently, occasional cleaning (every few months) can help prevent clogs.
Q: Can I use rubbing alcohol or other cleaning solutions?
- A: No, strictly use distilled water. Harsh chemicals can damage the print head.
Q: My print quality isn’t perfect even after cleaning. What should I do?
- A: If the cleaning process doesn’t resolve the issue entirely, here are some further troubleshooting steps:
- Deep Cleaning Cycle: Some Epson printers offer a “Deep Cleaning” option within the maintenance menu. This cycle uses more ink to perform a more thorough cleaning, but it may also consume more ink cartridges.
- Check Ink Cartridges: Ensure your ink cartridges have sufficient ink levels and are compatible with your Epson WorkForce 7310 model. Consider replacing low or empty cartridges.
- Printer Alignment: A misaligned printer head can cause printing inconsistencies. Consult your user manual for instructions on performing a print head alignment on your Epson WorkForce 7310.
- Contact Epson Support: If none of the above solutions work, it’s recommended to contact Epson support for further assistance. They may recommend additional troubleshooting steps or service options.
Additional Tips:
- Always store your printer in a clean, dust-free environment to minimize the risk of clogged print heads.
- Use genuine Epson ink cartridges whenever possible, as compatible brands might not function optimally and contribute to clogging.
- If you know you won’t be using your printer for an extended period, consider running a cleaning cycle before storing it. This helps prevent ink from drying out and clogging the print head.
Conclusion
By following these steps and recommendations, you can effectively clean the print head on your Epson WorkForce 7310 printer and restore its printing quality. Remember, if you’re uncomfortable with the process or the problem persists, consult a professional or Epson support for further assistance.

